Category: Truck Maintenance & Repairs

  • Fixing Rust Damage on Your Truck Body

    Fixing Rust Damage on Your Truck Body

    Fixing Rust Damage on Your Truck Body

    Rust damage can significantly affect the appearance and longevity of your truck. Over time, exposure to moisture and road elements can lead to the deterioration of metal surfaces, making it essential for truck owners to address these issues promptly. In this guide, we will walk you through the necessary steps to effectively repair rust damage on your truck body, ensuring that your vehicle remains in top condition and retains its value.

    Understanding the extent of rust damage is crucial before starting any repair work. Surface rust, which appears as small spots or patches, is often easier to treat compared to scale rust, which can penetrate deeper into the metal. In this article, we will discuss how to identify the different stages of rust, as well as the tools and materials needed to tackle these problems effectively.

    Additionally, the repair process involves several key steps, including cleaning the affected area, removing rust, applying primer, and painting to restore your truck’s appearance. By following this comprehensive guide, you will not only enhance your truck’s aesthetics but also protect it from further corrosion. With dedication and the right techniques, you can achieve professional-level repairs right in your own garage.

    Identifying the Extent of Rust Damage

    Understanding the level of rust damage on your truck’s body is crucial for effective repair. Start by examining the affected areas visually. Look for discoloration, which often indicates the presence of rust beneath the surface. Check for any bubbles or blisters in the paint; this can signify that rust is forming underneath, separating the paint from the metal.

    Focus on common rust-prone locations, such as the wheel wells, undercarriage, and around the doors. These spots are frequently exposed to moisture and debris, leading to accelerated rusting. Use a magnet to assess the integrity of the metal; if the magnet does not stick to a section of the body, it may suggest that rust has created a significant hole or weakened the metal.

    Next, perform a sound test. Gently tap on the rusty areas using a hammer or a similar tool. A hollow sound indicates potential decay beneath the surface, while a solid sound suggests the metal is still intact.

    Additionally, it is important to look for signs of penetration by probing the rusted spots with a screwdriver or a similar tool. If the tool goes through the rusted area easily, this indicates serious damage that may require extensive repair or replacement.

    Document your findings in detail, noting the size and location of each rust spot. Keep track of how deep the rust appears to be, as shallow surface rust is often easier to repair than deep corrosion. Assess whether the damage is localized to one area or if it has spread, as this will influence the approach you take during repairs.

    By meticulously evaluating these factors, you will gain a clearer understanding of the extent of rust damage on your truck. This assessment is essential for planning an effective repair strategy.

    Step-by-Step Process for Rust Removal and Repair

    Step-by-Step Process for Rust Removal and Repair

    Begin by assessing the extent of the rust damage on your truck body. Determine whether the rust is superficial or has penetrated deeper layers of metal, which may require more extensive repair.

    Gather necessary tools and materials, including sandpaper of varying grits, a wire brush, rust remover solution, an angle grinder, a clean rag, body filler, primer, and paint. Ensure you also have personal protective equipment, such as gloves and a mask.

    Next, clean the affected area thoroughly to remove dirt, grease, and debris. Use soap and water, followed by a clean rag to dry the surface. This step ensures you can accurately assess the rust damage beneath the surface layer.

    Once the area is clean, use a wire brush or angle grinder to remove loose rust and paint. Start with a coarse grit sandpaper to chip away at the rusted areas, then progress to finer grits for a smoother finish. Be careful to avoid damaging surrounding healthy metal.

    After rust removal, apply a rust converter solution to any remaining rust spots. This chemical transforms rust into a stable compound and prevents further corrosion. Follow the manufacturer’s instructions for the best results.

    Once the rust converter has dried, apply body filler if there are any deep pits or holes. Press the filler into the damaged areas and shape it to match the surrounding surface. Allow the filler to cure according to package instructions and sand it down for a seamless finish.

    Following the body filler application, clean the area again and apply a primer designed for metal surfaces. This step aids in adhering the final paint and provides an additional layer of protection against moisture.

    Once the primer has dried, it’s time to paint the repaired area. Choose a paint that matches your truck’s color. Apply multiple thin coats, allowing each coat to dry completely before applying the next. This technique ensures an even and professional-looking finish.

    Finally, after the final coat of paint has dried, clear the area of any tools and debris. Inspect your work, and if satisfied with the outcome, you may apply a clear coat for extra protection against wear and environmental factors.

    Regular maintenance inspections are recommended to catch any signs of rust early, ensuring the longevity of your truck body repair.

    Choosing the Right Paint and Finishing Techniques for Longevity

    Choosing the Right Paint and Finishing Techniques for Longevity

    When it comes to repairing rust damage on your truck body, selecting the appropriate paint and finishing techniques is crucial for ensuring durability and protection against future rust. The first step is to choose a high-quality automotive paint that is specifically designed for metal surfaces. Look for paints that contain rust-inhibiting properties and are resistant to chipping and fading.

    Consider using epoxy primers as a base coat. These primers provide excellent adhesion and corrosion resistance, creating a solid foundation for the paint. Applying a primer not only enhances the bond between the substrate and the paint but also helps prevent moisture from penetrating the metal surface.

    Next, the choice of paint finish is significant. A urethane enamel offers excellent durability and finishes with a glossy appearance, making it a popular choice for truck bodies. This type of paint withstands harsh weather conditions and provides a robust protective layer against scratches and UV rays. Always opt for paints with a hardener for added strength and longevity.

    Application techniques also play an essential role in the outcome. Achieving a smooth, even finish requires proper techniques such as spray painting or using a paint applicator. Ensure to apply multiple thin coats rather than a single thick coat to prevent runs and drips. Allow adequate drying time between coats to ensure each layer adheres properly and cures completely.

    Lastly, consider finishing your painted surface with a clear coat. This additional layer provides an extra level of protection, enhances shine, and aids in resisting chemicals and environmental damage. Ensure that the clear coat is compatible with your chosen paint for optimum results. By carefully choosing the right paint and employing effective finishing techniques, you can significantly prolong the life of your truck’s exterior while maintaining its aesthetic appeal.

  • Signs Your Truck Needs New Brakes

    Signs Your Truck Needs New Brakes

    Signs Your Truck Needs New Brakes

    Brakes are a crucial safety component of any vehicle, especially for trucks that often carry heavy loads. Over time, brake systems can wear down, leading to decreased performance and potentially dangerous situations. Regularly monitoring your truck’s braking system is essential to ensure safe operation and prevent costly repairs down the line.

    Identifying the signs that indicate your truck’s brakes may need immediate attention can save you from accidents and enhance the longevity of your vehicle. Whether you’re experiencing unusual sounds, altered braking response, or warning lights on your dashboard, understanding these indicators is vital to maintaining your truck’s performance on the road.

    In this article, we will explore the key signs that your truck is in urgent need of new brakes. Recognizing these signs quickly can not only improve your driving experience but also ensure the safety of you and others on the road. Stay informed and proactive to keep your vehicle in top shape.

    Unusual Noises When Braking

    Unusual Noises When Braking

    Hearing unusual noises when applying the brakes on your truck can indicate a serious problem that requires immediate attention. Common sounds to be aware of include squeaking, grinding, and popping.

    Squeaking noises often occur when the brake pads wear down and the metal backing comes into contact with the rotor. This indicates that it might be time to replace the brake pads. If the noise persists after replacement, it could be a sign of insufficient lubrication on the braking components.

    Grinding sounds are more alarming and suggest that the brake pads may be completely worn out. When this happens, the metal backing plates can grind against the rotors, causing damage to both components. Ignoring this sound can lead to costly repairs and decreased braking efficiency.

    Popping or rattling sounds could indicate loose or worn suspension components or even issues with the brake hardware itself. This requires a thorough inspection to determine if the problem is in the braking system or elsewhere in the vehicle.

    If you notice any unusual sounds when braking, it is essential to have your truck inspected promptly. Addressing these issues early can prevent further damage and ensure your vehicle remains safe to drive.

    Pulsating Brake Pedal Sensations

    Pulsating Brake Pedal Sensations

    If you experience a pulsating feeling when pressing the brake pedal, it is a clear indication that your truck may need new brakes. This sensation often occurs when the brake rotors are warped or unevenly worn, leading to inconsistent contact between the brake pads and the rotors.

    A pulsating brake pedal can cause vibrations that can be felt throughout the vehicle, compromising your ability to stop effectively. This can be particularly dangerous during emergency situations where prompt and reliable braking is essential. Additionally, the pulsation might be accompanied by a grinding noise, which indicates further wear on the braking components.

    To address this issue, it is important to have your braking system inspected by a qualified mechanic. They can determine the extent of wear and may recommend resurfacing or replacing the rotors, along with new brake pads. Ignoring this sensation can lead to more significant damage and costly repairs in the future.

    Regular maintenance of your truck’s braking system is crucial for safe driving. If you notice any unusual sensations in the brake pedal, do not hesitate to have them checked immediately to ensure your safety and the longevity of your vehicle.

    Increased Stopping Distance and Reduced Responsiveness

    One of the most critical signs that your truck requires new brakes is an increase in stopping distance. If you notice that it takes longer for your vehicle to come to a complete stop, it may indicate worn-out brake components.

    In addition to longer stopping distances, you may also experience reduced responsiveness when applying the brakes. This can lead to a dangerous situation, especially in emergency braking scenarios. Below are some key points to consider:

    • Brake Pad Wear: Over time, brake pads wear down, leading to decreased friction. This results in longer distances needed to stop the truck.
    • Vented Drums Issues: If your truck uses a drum brake system, worn or damaged drums can also affect stopping power, causing delays in response.
    • Brake Fluid Quality: Old or contaminated brake fluid can introduce air into the braking system, reducing responsiveness and efficacy.
    • Brake Line Problems: Leaks or blockages in the brake lines can inhibit fluid flow, resulting in a delayed brake response.

    It is essential to pay close attention to these symptoms. If you find yourself pressing harder on the brake pedal without a corresponding decrease in speed, it’s time to have your brakes inspected. Regular maintenance can help ensure that your truck remains safe and responsive on the road.

    Neglecting these signs can lead to severe consequences, including increased stopping distances that may result in accidents or collisions. Prioritize brake checks to maintain optimal braking performance.

  • Essential Truck Maintenance Tips for Longevity

    Essential Truck Maintenance Tips for Longevity

    Essential Truck Maintenance Tips for Longevity

    Maintaining your truck is crucial for achieving long-lasting performance and reliability on the road. Proper maintenance not only extends the lifespan of your vehicle but also improves its efficiency and safety. Neglecting maintenance tasks can lead to costly repairs and unexpected breakdowns, potentially jeopardizing your work schedule and safety.

    This article will outline essential maintenance tips that every truck owner should follow. From regular inspections and fluid checks to tire care and brake maintenance, these practices can significantly enhance your truck’s performance and durability. Implementing these strategies can help you avoid common pitfalls and keep your vehicle running smoothly for years to come.

    Whether you use your truck for commercial purposes or personal adventures, understanding the importance of routine maintenance is key. By investing time and effort into proper care, you can ensure that your truck remains a dependable companion, capable of meeting your needs in any situation.

    Regular Oil Changes and Fluid Checks

    Maintaining optimal performance for your truck heavily relies on regular oil changes and fluid checks. Engine oil lubricates the moving parts, reduces friction, and aids in temperature control. Over time, oil degrades and loses its effectiveness, leading to increased wear and tear on engine components.

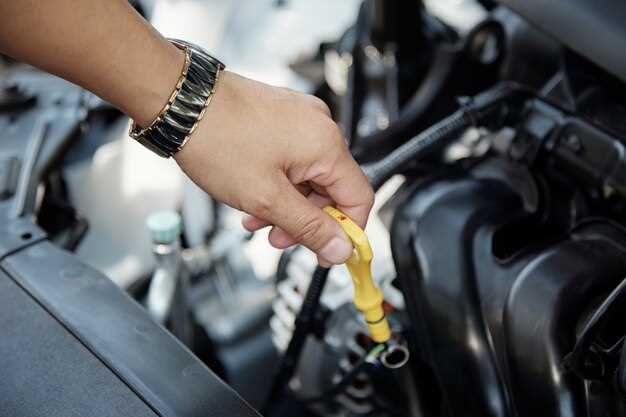
    Schedule oil changes according to the manufacturer’s recommendations, which can typically range from every 3,000 to 10,000 miles depending on the type of oil used. Synthetic oils often allow for longer intervals. Regularly inspecting the oil level and quality is equally crucial. A quick dipstick check can reveal if the oil is dirty or low, signaling the need for an immediate change.

    Alongside oil changes, fluid checks are essential for various systems within your truck. These include transmission fluid, brake fluid, coolant, and power steering fluid. Each fluid plays a vital role in the truck’s functionality and safety. For example, low transmission fluid can lead to shifting problems, while insufficient brake fluid can compromise stopping power.

    Routine checks of these fluids can prevent costly repairs down the line. Always ensure that fluids are at the appropriate levels and free of contaminants. Top them off as needed, and replace any fluids that appear discolored or have a burnt smell. By adhering to a consistent schedule for oil changes and fluid maintenance, you will not only enhance your truck’s performance but also extend its lifespan significantly.

    Tire Care: Rotation, Alignment, and Pressure Monitoring

    Tire Care: Rotation, Alignment, and Pressure Monitoring

    Proper tire care is essential for ensuring optimal performance and safety of your truck. Regular attention to tire rotation, alignment, and pressure monitoring can extend tire life and improve handling.

    Tire rotation is the practice of changing the position of each tire on the vehicle in a specific pattern. This process helps to ensure even tread wear, which is crucial for maintaining traction and stability. It’s recommended to rotate tires every 5,000 to 7,000 miles or as specified by the vehicle manufacturer. Ignoring tire rotation can lead to uneven wear, resulting in the need for premature tire replacement and potentially compromising safety.

    Alignment refers to the adjustment of the truck’s suspension system, which affects how the tires make contact with the road. Proper alignment ensures that all four tires are sitting perpendicular to the road and parallel to each other. Misalignment can occur due to hitting potholes, curbs, or general wear and tear. Poor alignment leads to uneven tire wear, steering issues, and can negatively impact fuel efficiency. Regular alignment checks, ideally every 10,000 miles or if you notice unusual handling, can prevent these problems.

    Maintaining correct tire pressure is vital for both safety and performance. Under-inflated tires can cause poor handling, increased fuel consumption, and excessive wear. Conversely, over-inflated tires can lead to a harsh ride and reduced traction. It’s recommended to check tire pressure at least once a month and before long trips, using a reliable tire pressure gauge. The ideal pressure for your truck’s tires can usually be found on a sticker inside the driver’s door or in the vehicle’s manual.

    In conclusion, regular tire rotation, alignment checks, and monitoring tire pressure are critical components of truck maintenance. Implementing these practices not only enhances the longevity of the tires but also ensures better driving performance and safety on the road.

    Importance of Brake Inspection and Replacement

    Importance of Brake Inspection and Replacement

    Regular brake inspection and timely replacement are critical for maintaining the safety and performance of trucks. Brakes are one of the most vital components of a vehicle, responsible for controlling speed and stopping power. Neglecting brake maintenance can lead to serious accidents, endangering not only the driver’s safety but also the safety of others on the road.

    Brakes can show signs of wear through various indicators, such as squeaking or grinding noises, a spongy feeling in the brake pedal, or a decrease in braking efficiency. Regular inspections allow for the early identification of these issues, enabling truck owners to address them before they escalate into costly repairs or dangerous failures. During an inspection, professionals can evaluate brake pads, rotors, linings, and hydraulic systems to ensure they are functioning properly.

    Additionally, different driving conditions can significantly affect brake wear. Trucks often operate in challenging environments, including heavy traffic, steep inclines, and various weather conditions. This variability requires more frequent inspections to adapt to changing performance demands. Regular checks help in maintaining optimal braking performance, which is essential for the heavy loads that trucks often carry.

    When it comes to brake replacement, using high-quality parts is crucial. Aftermarket components may save money initially but can result in poorer performance and safety risks. Investing in reliable and durable brake parts enhances not only the truck’s longevity but also ensures that it meets safety standards.

    In summary, prioritizing brake inspection and replacement is essential for any truck owner looking to ensure long-lasting performance and safety. Regular maintenance not only extends the lifespan of brake components but also contributes to overall vehicle reliability, reducing the likelihood of breakdowns and accidents on the road.

  • Diagnosing Common Truck Engine Problems

    Diagnosing Common Truck Engine Problems

    Diagnosing Common Truck Engine Problems

    In the world of trucking, engine performance is pivotal to efficiency and reliability. A well-functioning engine not only ensures smoother operation but also extends the lifespan of the vehicle. However, truck engines can experience a range of issues, each having unique signs and symptoms. Understanding these common problems is essential for any truck owner or operator looking to maintain optimal performance.

    Engine issues can stem from various sources, including fuel system malfunctions, electrical complications, and mechanical failures. Identifying these problems early can save time and costly repairs. This article delves into the most frequently encountered engine performance issues in trucks, providing insights into diagnostics and potential solutions. With a focus on user-friendly guidelines, we aim to equip truck operators with the knowledge to address these concerns effectively.

    By recognizing the symptoms associated with engine inefficiencies, operators can take proactive measures. Whether it’s a loss of power, unusual noises, or excessive exhaust emissions, the early detection of these signs can lead to timely interventions. In the following sections, we will explore each common issue, helping you become proficient in diagnosing engine performance problems.

    Identifying Symptoms of Engine Misfire in Heavy-Duty Trucks

    Identifying Symptoms of Engine Misfire in Heavy-Duty Trucks

    Engine misfire in heavy-duty trucks is a critical issue that can lead to decreased performance and potential engine damage if not addressed promptly. Recognizing the symptoms early can help prevent further complications. Common signs of an engine misfire include irregular engine idle, which may feel shaky or unstable when the truck is stationary. Drivers may also experience a noticeable loss of power, particularly during acceleration or when climbing inclines, as the engine struggles to maintain performance.

    Another indication of a misfire is the presence of a rough running condition, where the truck exhibits jerking or stalling during operation. This can be particularly concerning when driving at high speeds or under heavy loads. Additionally, abnormal exhaust emissions can signal a problem, with visible smoke or excessive emissions often accompanying a misfiring engine.

    Drivers should also be aware of potential dashboard warning lights, especially the check engine light. If this light illuminates, it may indicate a misfire along with additional diagnostics that could narrow down the underlying issue. Unusual engine sounds, such as popping or backfiring, can further confirm misfire symptoms, indicating that fuel is not igniting properly within the combustion chamber.

    Finally, decreased fuel efficiency can be a notable symptom of a misfire. A sudden drop in miles per gallon may suggest that the engine is working harder to compensate for the misfire. Monitoring these symptoms closely can help truck operators take appropriate action before the situation escalates into more severe problems.

    Assessing Fuel Efficiency Problems and Their Impact on Performance

    Assessing Fuel Efficiency Problems and Their Impact on Performance

    Fuel efficiency is a critical aspect of truck performance that directly affects operating costs and overall productivity. When a truck experiences decreased fuel efficiency, it can signal underlying mechanical issues or inefficiencies that need to be addressed. Identifying and assessing these problems is essential to maintaining optimal engine performance.

    One of the most common causes of poor fuel efficiency is a malfunctioning fuel system. Issues such as clogged fuel filters, failing fuel pumps, or faulty injectors can disrupt the delivery of fuel to the engine, leading to incomplete combustion and increased fuel consumption. Regular inspection of the fuel system components can identify potential problems before they significantly impact performance.

    Another significant factor affecting fuel efficiency is the condition of the engine itself. Worn components, such as piston rings or cylinder walls, can lead to decreased compression and inefficient fuel burning. Additionally, the air intake system must be clean and unobstructed. A dirty air filter can limit airflow, causing the engine to work harder and consume more fuel. Periodic maintenance, including changing filters and inspecting engine components, is vital for ensuring efficient performance.

    Tire pressure and condition also play a key role in fuel efficiency. Under-inflated or unevenly worn tires increase rolling resistance, forcing the engine to exert more power to maintain speed. Regular tire inspections and maintaining proper inflation levels can enhance both fuel efficiency and vehicle handling.

    Driving habits significantly influence fuel consumption as well. Aggressive driving, such as rapid acceleration and hard braking, can lead to excessive fuel use. Training drivers in fuel-efficient driving practices can help mitigate inefficiencies and extend the life of the vehicle.

    Monitoring fuel efficiency metrics, such as miles per gallon (MPG) or fuel consumption per mile, can provide valuable insights into performance trends. By analyzing these metrics over time, fleet managers can identify abnormal consumption patterns and take corrective action, whether it involves maintenance, repairs, or driver training programs.

    In summary, addressing fuel efficiency problems promptly is crucial for maintaining truck engine performance. Regular maintenance, attention to driving habits, and continuous monitoring can help prevent inefficiencies that not only affect fuel consumption but also compromise the overall reliability and longevity of the vehicle.

    Analyzing Exhaust Emissions and Their Relationship to Engine Health

    Exhaust emissions are a critical indicator of a truck engine’s health and performance. Analyzing these emissions can provide valuable insights into potential issues that may affect engine efficiency and reliability. The composition of exhaust gases, primarily carbon monoxide (CO), nitrogen oxides (NOx), hydrocarbons (HC), and particulate matter (PM), serves as a diagnostic tool for identifying underlying problems.

    Carbon Monoxide (CO) is a colorless, odorless gas produced during incomplete combustion. Elevated levels of CO in exhaust can indicate a rich fuel mixture, improper fuel injection, or malfunctioning oxygen sensors. These issues may lead to reduced fuel efficiency and increased engine wear if left unaddressed.

    Nitrogen Oxides (NOx) are formed at high temperatures during combustion and are typically associated with high combustion pressures. Excessive NOx emissions can signal problems such as inadequate combustion chamber temperatures or a faulty EGR (Exhaust Gas Recirculation) system. Addressing NOx issues is crucial, as they contribute to air pollution and can signal a need for maintenance or adjustments in the engine’s timing.

    Hydrocarbons (HC) represent unburned fuel or fuel that has undergone incomplete combustion. High HC emissions often suggest issues such as valve leakage, worn piston rings, or malfunctioning fuel injectors. Reducing HC emissions is essential, not only for improving engine performance but also for compliance with environmental regulations.

    Particulate Matter (PM) primarily comprises soot from diesel engines and can indicate improper fuel combustion or issues with the fuel delivery system. High levels of PM can lead to clogged filters and reduced engine efficiency. Regular monitoring of PM can help detect maintenance needs before they escalate into more serious problems.

    To effectively analyze exhaust emissions, regular diagnostic checks should be performed. Utilizing advanced emission testing equipment can help quantify the levels of various gases and particulate matter, allowing for a comprehensive assessment. Correlating these emission levels with engine performance parameters helps in pinpointing specific issues and formulating targeted solutions.

    In conclusion, exhaust emissions analysis is a valuable strategy for maintaining optimal truck engine health. By closely monitoring emission levels and understanding their implications, truck owners and mechanics can address potential issues proactively, ensuring improved performance, greater fuel efficiency, and prolonged engine life.

  • How to Check and Replace Transmission Fluid

    How to Check and Replace Transmission Fluid

    How to Check and Replace Transmission Fluid

    Transmission fluid plays a vital role in the performance and longevity of your vehicle’s transmission system. It lubricates the internal components, helps cool the transmission, and facilitates smooth gear shifts. Over time, this fluid can degrade and become contaminated, potentially leading to costly repairs if not properly maintained.

    In this guide, we will walk you through the essential steps for checking and changing your transmission fluid. Whether you are a seasoned mechanic or a novice car owner, understanding the importance of this task and knowing how to perform it can save you time, money, and headaches in the future.

    From identifying the right type of fluid for your vehicle to knowing when to perform a change, we will cover all the aspects necessary for effective maintenance. With this knowledge, you can ensure your transmission remains in optimal condition, contributing to a smoother driving experience and the overall health of your vehicle.

    How to Check Transmission Fluid Levels Accurately

    How to Check Transmission Fluid Levels Accurately

    Checking the transmission fluid levels is crucial for maintaining the health of your vehicle’s transmission system. Follow these steps for an accurate assessment.

    Firstly, ensure the vehicle is parked on a level surface and the engine is running. This allows the transmission fluid to circulate, providing a more accurate reading. If the vehicle has been recently driven, let the engine idle for a few minutes to warm up the fluid to its normal operating temperature.

    Next, locate the transmission dipstick, which is typically located near the back of the engine bay. Remove the dipstick, wipe it clean with a lint-free cloth or paper towel to eliminate any residue that could affect the reading, and reinsert it fully into the tube. Then, remove it again to check the fluid level.

    Examine the dipstick for fluid level indicators. The fluid should be within the ‘full’ and ‘low’ markings. If the level is at or below the ‘low’ mark, additional fluid is needed. Make sure to use the correct type of transmission fluid as specified in your vehicle’s owner manual.

    While checking the fluid level, also assess the fluid’s color and consistency. Healthy transmission fluid is usually a bright red or pink color, while dark brown or black indicates contamination or degradation. If the fluid appears cloudy or has a burnt smell, it may be time for a change.

    If the fluid level is low, use a funnel to add fluid gradually, checking the level frequently to avoid overfilling. After reaching the desired level, securely reinsert the dipstick and close the engine compartment. Regular checks can help prevent transmission issues and extend the life of your vehicle.

    Steps for Draining and Replacing Transmission Fluid Safely

    Changing your vehicle’s transmission fluid can ensure optimal performance and longevity of the transmission system. Follow these steps for a safe and effective process.

    1. Gather Necessary Tools and Materials: Before starting, make sure you have the required tools and materials at hand. You will need a wrench set, a drain pan, a funnel, new transmission fluid, and a filter (if applicable). Always consult your vehicle’s manual for the specific type and amount of fluid required.

    2. Prepare the Vehicle: Park your vehicle on a level surface and set the parking brake. Ensure the engine is off and cool, then disconnect the battery to prevent any electrical hazards during the process.

    3. Locate the Transmission Drain Plug: Refer to your vehicle’s manual to find the transmission drain plug. Position a drain pan underneath the drain plug to catch the fluid as it drains. If necessary, raise the vehicle using jack stands for better access.

    4. Drain the Old Transmission Fluid: Using the appropriate wrench, carefully remove the drain plug. Allow the old transmission fluid to fully drain into the pan. Be cautious, as the fluid may be hot if the engine was recently running. Once the fluid has completely drained, replace and tighten the drain plug securely.

    5. Replace the Transmission Filter (if applicable): Some vehicles require a filter change during fluid replacement. If yours does, locate and remove the old filter according to the manual’s instructions. Clean the filter housing and install the new filter, ensuring a snug fit.

    6. Add New Transmission Fluid: Using a funnel, pour the new transmission fluid into the dipstick tube or designated fill point. Refer to your vehicle’s manual for the correct fill level. Check the fluid level with the dipstick as you fill, adding fluid as necessary.

    7. Check for Leaks: Once you have added the new fluid, start the engine and let it idle for a few minutes. Shift through all the gears while the vehicle is stationary. Check for any leaks around the drain plug and filter area. If leaks are present, address them before proceeding.

    8. Dispose of Old Fluid Properly: Do not pour used transmission fluid down the drain or throw it in the trash. Instead, take the old fluid to a recycling center or an automotive shop that accepts used oil and fluids.

    Following these steps will help you drain and replace your transmission fluid safely, assisting in maintaining your vehicle’s performance.

    Identifying Signs of Transmission Fluid Contamination

    Identifying Signs of Transmission Fluid Contamination

    Contaminated transmission fluid can lead to severe damage in your vehicle’s transmission system. Recognizing the signs of contamination early can help prevent costly repairs. One major indicator is a change in color. Healthy transmission fluid typically appears red or amber, while contaminated fluid may turn dark brown or even black.

    Another sign is the presence of a burnt smell. If the fluid emits a strong, acrid odor, it likely means it has overheated and degraded. This can indicate that the fluid is not effectively lubricating the transmission components, leading to further problems.

    Moreover, if you notice metal shavings or debris in the fluid when checked, this is a clear sign of internal wear and potential contamination. Excessive dirt or sludge can also indicate that the fluid is no longer functioning properly and has accumulated harmful particles.

    Additionally, irregular gear shifts or slipping can signal that the transmission fluid is no longer providing the necessary hydraulic pressure. If your vehicle hesitates or has difficulty engaging gears, it’s vital to check the condition of the transmission fluid.

    Finally, if the fluid level consistently drops without visible leaks, it may suggest internal issues where contaminants or debris are interfering with the proper sealing of components. Regularly inspecting and maintaining your transmission fluid can help catch these issues early and extend the life of your vehicle’s transmission.

  • How Often Should You Service Your Truck?

    How Often Should You Service Your Truck?

    How Often Should You Service Your Truck?

    Proper maintenance is essential for the longevity and reliability of any truck. Regular maintenance not only ensures that the vehicle operates efficiently but also significantly reduces the risk of breakdowns and costly repairs. Understanding the frequency of scheduled maintenance can help truck owners and operators keep their vehicles in top condition.

    Factors such as the type of truck, its usage, and the driving conditions play a crucial role in determining how often maintenance should be performed. Commercial trucks, for instance, typically require more frequent checks compared to personal vehicles due to their heavier workloads and longer operating hours. Moreover, harsh environmental conditions and varying terrains can accelerate wear and tear, necessitating more regular upkeep.

    In this article, we will explore the recommended maintenance schedules for different types of trucks, key indicators that may necessitate unscheduled maintenance, and the long-term benefits of a proactive maintenance approach. By establishing a consistent maintenance routine, truck owners can ensure optimal performance and safety while also extending the lifespan of their vehicles.

    Understanding the Manufacturer’s Maintenance Schedule

    Understanding the Manufacturer's Maintenance Schedule

    Every truck manufacturer provides a detailed maintenance schedule that outlines essential services and inspections necessary to keep the vehicle operating efficiently. This schedule typically includes recommendations for oil changes, filter replacements, tire rotations, and other critical checks. Adhering to the manufacturer’s guidelines helps prevent serious issues that could arise from neglecting maintenance.

    The maintenance schedule is usually located in the owner’s manual and is divided into time intervals, such as mileage or months. It identifies specific tasks to be completed at each interval, allowing owners to plan service appointments accordingly. It is crucial to follow these timelines, as they are designed based on extensive testing and engineering principles tailored to each truck model.

    For optimal performance, truck owners should not only rely on the maintenance schedule but also consider their operational conditions. For example, trucks used in harsher environments or for towing may require more frequent maintenance than what the schedule recommends. Keeping a detailed log of maintenance activities can help track compliance and identify any patterns that may suggest the need for additional service.

    Utilizing the manufacturer’s maintenance schedule not only prolongs the lifespan of the vehicle but also ensures safety on the road. Neglecting these recommendations can lead to increased wear and tear, reduced fuel efficiency, and higher chances of breakdowns. Therefore, understanding and following this schedule is essential for any truck operator committed to maintaining their vehicle in peak condition.

    Identifying Signs That Indicate Immediate Maintenance

    Identifying Signs That Indicate Immediate Maintenance

    Recognizing the signs that your truck requires immediate maintenance is crucial for ensuring safety and reliability on the road. Ignoring these indicators can lead to costly repairs and potential accidents. Here are several key signs that should prompt immediate attention:

    1. Warning Lights: Dashboard warning lights are one of the first indications that something may be wrong. Lights indicating engine issues, low oil pressure, or battery problems should not be ignored. Address these alerts promptly to avoid further complications.

    2. Unusual Noises: Any new or unusual sounds, such as grinding, knocking, or squeaking, can signal a serious problem. These noises often indicate issues with components like brakes, the transmission, or the engine. Early diagnosis can prevent severe damage.

    3. Fluid Leaks: Puddles or stains under your truck can indicate leaks from critical systems. Oil, coolant, transmission fluid, and brake fluid leaks require immediate attention, as they can negatively impact performance and safety.

    4. Vibration or Handling Issues: If your truck experiences excessive vibration or difficulty in steering, it may point to tire issues, alignment problems, or suspension concerns. These issues can compromise control and increase the risk of accidents.

    5. Poor Performance: A noticeable drop in performance, such as reduced acceleration or a struggling engine, may signal underlying issues. This could relate to fuel systems, exhaust problems, or even electrical faults. Prompt evaluation is necessary to restore functionality.

    6. Smoke or Odors: The presence of smoke or strange odors emanating from your truck can indicate serious issues, such as overheating or burning oil. Taking immediate action can help avert catastrophic failures.

    7. Changes in Fuel Efficiency: Sudden declines in fuel economy can signify mechanical problems, air filter blockages, or issues with the injection system. Regular monitoring can help catch these problems before they worsen.

    Staying alert to these critical signs is essential for maintaining your truck’s health and performance. Always consult a professional mechanic when any of these signs arise to ensure thorough inspections and repairs.

    Seasonal Considerations for Truck Maintenance Frequency

    Understanding seasonal changes is crucial for determining the maintenance frequency of trucks. Each season presents unique challenges that can impact the performance and longevity of a vehicle. For instance, in winter, cold temperatures can lead to issues such as battery failure, thickened fluids, and reduced tire pressure. Therefore, it is advisable to conduct a comprehensive inspection before the onset of winter, focusing on battery health, antifreeze levels, and tire conditions.

    During the summer months, high temperatures can cause engine overheating and strain on the cooling system. Regular checks on coolant levels and ensuring that the radiator is functioning optimally should be prioritized. Additionally, summer driving often involves increased wear on tires due to heat and road conditions, warranting more frequent tire inspections and rotations.

    Spring and fall also present their own maintenance challenges. In spring, vehicles should be checked for any winter-related damage, and components like wiper blades and fluid levels should be assessed as weather conditions change. Conversely, fall maintenance should focus on preparing for winter, including inspecting the heating system and ensuring the truck is equipped for snow and icy conditions.

    Ultimately, the frequency of truck maintenance should be adjusted based on seasonal demands. By planning maintenance around seasonal changes, fleet managers can reduce the risk of breakdowns and extend the lifespan of their vehicles, ensuring that safety and efficiency are maintained year-round.

  • How to Replace a Truck Battery Safely

    How to Replace a Truck Battery Safely

    How to Replace a Truck Battery Safely

    Replacing the battery in your truck might seem like a daunting task, but with the right knowledge and precautions, it can be a straightforward process. Understanding the importance of a reliable battery in your truck’s performance is essential. A strong battery not only powers the engine but also supports various electrical systems, ensuring that your vehicle runs smoothly.

    In this guide, we will walk you through the safe steps to replace your truck’s battery effectively. We’ll highlight the necessary tools, safety measures, and detailed procedures to make the task simpler and safer. Following these steps not only helps prevent potential injuries but also protects your vehicle’s electronic components.

    Whether you are a seasoned mechanic or a novice DIYer, learning how to replace your truck battery could save you both time and money. Let’s dive into the essential steps that will ensure a successful and secure battery replacement.

    Choosing the Right Battery for Your Truck

    Selecting the appropriate battery for your truck is crucial for optimal performance and longevity. Begin by determining the specifications required for your truck model. Refer to your owner’s manual for details on the recommended cold cranking amps (CCA) and reserve capacity (RC). These ratings ensure that your battery can start your engine in various weather conditions and sustain electrical loads.

    Battery Type is another essential factor. The two main types are flooded lead-acid and absorbed glass mat (AGM). Flooded batteries are typically more affordable and widely available, but AGM batteries offer superior performance, especially in extreme temperatures and for trucks with advanced electrical systems.

    Size and Compatibility is critical as well. Batteries come in various sizes, and it is essential to choose one that fits your truck’s battery tray correctly. Refer to the Group Size specification in your manual, ensuring proper fitment to prevent movement or disconnection.

    Brand and Quality are paramount in battery selection. Opt for reputable brands known for reliability and warranty support. Consider batteries with a longer warranty period, as this often indicates better quality and performance expectations.

    Lastly, price should be balanced with performance and longevity. While it may be tempting to choose the cheapest option, investing in a quality battery can save you money in the long run through higher efficiency and fewer replacements.

    Step-by-Step Guide to Removing the Old Battery

    Step-by-Step Guide to Removing the Old Battery

    Before you start, make sure you have the necessary tools: a socket wrench, gloves, and safety glasses. Begin by ensuring the vehicle is in park, the ignition is off, and the keys are removed. This will help prevent any accidental electrical discharge or movement.

    Open the hood of your truck and locate the battery. Typically, it is situated near the front of the engine compartment. Identify the terminals: the positive terminal, usually marked with a “+” sign and often covered with a red cap, and the negative terminal, marked with a “-” sign and usually covered with a black cap.

    Put on your gloves and safety glasses for protection. Start with the negative terminal. Using the socket wrench, loosen the nut on the negative terminal clamp. Once loose, carefully wiggle the clamp off the terminal post. Make sure not to touch any metal with the wrench once it’s in contact with the negative terminal.

    Next, move to the positive terminal and repeat the process. Loosen the nut on the positive terminal clamp, then remove it from the terminal post. Again, avoid any body contact between the wrench and the truck’s metal parts.

    With both terminals disconnected, locate the battery securing mechanism. This could be a bracket or a strap that holds the battery in place. Using the socket wrench, remove the bolts securing the battery. If necessary, check for any additional securing methods such as rubber straps or clips.

    After the battery is free, carefully lift it out of the battery tray. Truck batteries are heavy, so use both hands and be mindful of your posture to prevent injury. Place the old battery in a safe location, ideally in a battery recycling area or a designated battery disposal site.

    Inspect the battery tray and clean any corrosion or debris before proceeding to install the new battery.

    Proper Installation Techniques for Your New Battery

    Proper Installation Techniques for Your New Battery

    Installing a new truck battery requires attention to detail to ensure optimal performance and safety. Start by gathering the necessary tools, including a wrench, socket set, and safety gloves. Ensure your truck is parked on a level surface with the engine turned off and keys removed from the ignition.

    Before removing the old battery, take a moment to identify the battery terminals. The positive terminal is usually marked with a “+” sign, while the negative terminal bears a “-” sign. Always begin by disconnecting the negative terminal first to prevent any short circuits. Using your wrench, loosen the nut on the negative terminal and gently pull the cable away from the battery. Repeat the process for the positive terminal.

    Carefully remove the old battery from its tray, taking care not to tilt it excessively, as this can spill acid if the battery is of the flooded type. Check the battery tray and clean it of any corrosion or debris before proceeding with the installation of the new battery.

    When placing the new battery in the tray, ensure it is securely positioned and that the terminals are accessible. Connect the positive terminal first, sliding the cable over the terminal and tightening the nut with your wrench until secure. Proceed to attach the negative terminal in the same manner. It’s vital that both terminals are tightly connected to prevent battery issues.

    After installation, double-check that all connections are firm. If your battery has a hold-down clamp, make sure to secure it, as this will prevent excessive movement while driving. Finally, conduct a visual inspection of the installation, ensuring there are no loose cables and that the battery is clean and properly positioned in the tray.

    Dispose of the old battery responsibly by taking it to a recycling center or an automotive store that accepts used batteries. Proper battery installation guarantees reliable performance and extends the life of your truck’s electrical system.

  • Best Tires for All-Terrain Trucks

    Best Tires for All-Terrain Trucks

    Best Tires for All-Terrain Trucks

    When it comes to enhancing your truck’s performance, choosing the right all-terrain tires is essential. All-terrain tires are specifically designed to tackle a variety of surfaces, from rugged off-road trails to smooth highways. With countless options available, finding the best tires that offer durability, traction, and comfort can be overwhelming. This article will guide you through a selection of top-rated all-terrain tires that you can trust for your truck.

    Investing in quality all-terrain tires not only improves your truck’s capabilities but also significantly impacts your safety and driving experience. The ideal all-terrain tire should strike a balance between off-road performance and on-road stability. This balance ensures that you can confidently navigate diverse environments, whether you’re hauling heavy loads or exploring unpaved paths.

    In this comprehensive guide, we will evaluate the best all-terrain tires on the market, focusing on factors such as tread design, material quality, and customer satisfaction. By the end of this article, you will be well-equipped to make an informed decision, ensuring your truck is ready to face any terrain with reliability and ease.

    Choosing the Right All-Terrain Tire for Your Truck’s Needs

    Choosing the Right All-Terrain Tire for Your Truck's Needs

    Selecting the appropriate all-terrain tire for your truck involves several key considerations that impact performance, safety, and overall driving experience. Here are the critical factors to evaluate:

    • Driving Conditions:

      Consider the primary environments where you will drive your truck. Do you encounter mud, sand, rocky paths, or snow? Each terrain demands specific tread patterns and tire features. For instance:

      • Mud: Opt for tires with deep, aggressive treads.
      • Sand: Choose tires that are wider to prevent sinking.
      • Rocky Terrain: Look for reinforced sidewalls for added protection.
      • Snow: Select tires designed for winter conditions with optimal grip.
    • Tread Design:

      The tread pattern plays a vital role in traction and handling. Consider the following types:

      • Symmetrical Tread: Improves stability and provides even wear.
      • Directional Tread: Enhances handling in wet conditions.
      • Open Tread Design: Ideal for off-road traction, providing better self-cleaning capabilities.
    • Tire Size:

      Ensure the tire size matches your truck’s specifications. Considerations include:

      • Aspect ratio, width, and diameter.
      • Clearance issues to prevent rubbing on the suspension.
      • Load ratings for hauling and towing capabilities.
    • Durability:

      Check the tire’s construction materials and design to ensure it can withstand rugged conditions. Look for:

      • Reinforced sidewalls for puncture resistance.
      • Durable tread compounds that resist wear and tear.
    • Noise Levels:

      All-terrain tires can be noisy at highway speeds. Balance your need for off-road capability with acceptable road noise for your typical driving. Review user reviews and tire tests for noise ratings.

    • Price vs. Performance:

      All-terrain tires come at varying price points. Assess:

      • Budget constraints versus the intended use of the truck.
      • Long-term reliability and warranties offered by manufacturers.

    In conclusion, understanding your specific needs and evaluating these factors will help you choose the right all-terrain tire that enhances your truck’s performance across various terrains while ensuring safety and comfort.

    Comparing Performance: Tread Patterns and Durability of Popular Models

    Comparing Performance: Tread Patterns and Durability of Popular Models

    When selecting all-terrain tires for trucks, understanding the intricacies of tread patterns and their durability is essential for maximizing performance. Different tread designs cater to various driving conditions, including mud, snow, and rocky terrains. This section examines how popular all-terrain tire models compare in these vital areas.

    Tread Patterns play a critical role in determining a tire’s grip and handling. Tires such as the BFGoodrich All-Terrain T/A KO2 feature an aggressive tread pattern with large, interlocking lugs. This design enhances traction in off-road conditions, providing better performance on loose surfaces while maintaining stability on highways. Conversely, the Goodyear Wrangler Duratrac offers a unique mix of aggressive tread with tighter spacing, which optimizes performance in both on-road and off-road settings, allowing for excellent mud evacuation and enhanced highway comfort.

    Another prominent model, the Michelin LTX A/T2, features a more refined tread pattern aimed at improving road noise and comfort during highway driving. Although its off-road capabilities are commendable, they are more subdued compared to the rugged options. Thus, depending on the primary use of the vehicle, the choice of tread pattern can significantly affect driving experience and performance metrics.

    Durability is equally important when assessing all-terrain tires, particularly for trucks used in demanding environments. Tires like the Nitto Terra Grappler G2 are designed with robust sidewalls, designed to resist punctures and abrasions, making them ideal for rocky terrains. Their dual tread design allows for long-lasting performance, effectively balancing off-road traction with on-road stability.

    On the other hand, the Toyo Open Country A/T III is engineered with advanced rubber compounds that improve wear resistance, ensuring longevity and consistent performance over time. Over rough surfaces, the tires exhibit impressive durability, appealing to those who regularly venture off the beaten path.

    In summary, when comparing the performance of all-terrain tires, tread patterns crucially influence traction, handling, and overall driving comfort. Likewise, durability dictates the longevity and reliability of a tire under various conditions. Selecting a tire that best suits the intended usage scenario will enhance both safety and performance for truck owners.

    Maintenance Tips to Extend the Life of Your All-Terrain Tires

    All-terrain tires are designed to handle a variety of surfaces, but proper maintenance is essential to ensure their longevity and performance. Here are critical tips to help you extend the life of your all-terrain tires.

    1. Regular Tire Rotation

    Rotate your tires every 5,000 to 7,500 miles to promote even wear. Uneven tire wear can lead to decreased traction and handling, particularly in challenging off-road conditions.

    2. Maintain Proper Tire Pressure

    Check tire pressure at least once a month and before long trips. Under-inflated or over-inflated tires can lead to premature wear and reduced performance. Refer to your vehicle’s manual for the recommended pressure levels.

    3. Inspect for Damage

    Regularly inspect your tires for signs of damage, including cuts, punctures, and cracks. Address any issues immediately to prevent further damage and ensure safe driving.

    4. Monitor Tread Depth

    Keep an eye on the tread depth, as adequate tread is crucial for traction. Use a tread depth gauge to check wear. If the tread is less than 3/32 of an inch, it may be time to replace the tires.

    5. Clean Tires Regularly

    Wash your tires regularly to remove dirt, mud, and debris. This helps prevent corrosion and buildup that can damage the rubber over time. Pay attention to the sidewalls and tread grooves.

    6. Align and Balance Your Wheels

    Get your wheels aligned and balanced as needed. Misalignment can cause uneven wear and affect handling, especially when driving on various terrains. Typically, check alignment every 6,000 miles or if you notice abnormal tire wear.

    7. Avoid Excessive Load

    Follow your vehicle’s load capacity guidelines. Overloading your truck can lead to increased tire wear and potential blowouts. Be mindful of weight limits, especially when off-roading.

    8. Drive Accordingly

    Adapt your driving style to the terrain. Sudden accelerations, hard turns, and aggressive braking on uneven surfaces can increase wear. Practice smooth driving to minimize stress on your all-terrain tires.

    By following these maintenance tips, you can significantly extend the life of your all-terrain tires, ensuring they perform well in both on-road and off-road conditions.

  • How to Change Your Truck’s Oil at Home

    How to Change Your Truck’s Oil at Home

    How to Change Your Truck’s Oil at Home

    Changing the oil in your truck is a crucial maintenance task that helps ensure its longevity and performance. By performing this operation yourself, you can save money and gain a better understanding of your vehicle. Regular oil changes contribute to the overall health of your engine, improving efficiency and reducing wear over time.

    This guide provides a detailed step-by-step approach to changing your truck oil at home. Whether you are a seasoned mechanic or a novice enthusiast, the following instructions will help you navigate the process with confidence. Having the right tools and materials ready will make the task smoother and more efficient.

    In this article, we will cover everything from gathering necessary equipment and supplies to disposing of your used oil responsibly. By the end of this guide, you will have the knowledge to maintain your truck’s engine oil like a pro. Ready to get started? Let’s dive in!

    Gathering the Necessary Tools and Supplies for an Oil Change

    Before you begin the oil change process, it is essential to gather all the necessary tools and supplies to ensure a smooth and efficient experience. Start by collecting the following items:

    1. Oil Filter Wrench: This tool helps to easily remove the old oil filter. Choose a wrench type that fits the size of your filter for better leverage.

    2. Oil Catch Pan: A container is required to catch the old oil as it drains from your truck. Make sure it is large enough to hold the entire oil capacity of your engine.

    3. Socket Wrench Set: A set of socket wrenches is necessary for removing the drain plug from the oil pan. Ensure you have the correct size socket, typically between 12mm to 15mm, depending on your truck model.

    4. Funnel: A funnel will help you pour new oil into the engine without spilling. Choose a funnel with a wide mouth for easier handling.

    5. New Oil: Select the right type and viscosity of oil recommended by your vehicle’s manufacturer. Consider using high-quality synthetic oil for better engine performance.

    6. New Oil Filter: Always replace your oil filter during an oil change. Check the owner’s manual for the correct filter type compatible with your truck.

    7. Rags or Paper Towels: These will be useful for cleaning up spills and wiping your hands during the process. Keep them handy to maintain a tidy workspace.

    8. Safety Gear: Wear gloves and safety glasses to protect yourself from oil splashes and harsh chemicals while working.

    Once you have gathered all these tools and supplies, you will be adequately prepared to perform a successful oil change at home.

    Step-by-Step Guide to Draining Old Oil and Replacing the Oil Filter

    Step-by-Step Guide to Draining Old Oil and Replacing the Oil Filter

    Changing the oil filter and draining old oil are crucial steps in maintaining the health of your truck’s engine. Follow this guide to complete the process effectively.

    Step 1: Gather Materials

    Before starting, collect the following supplies: an oil catch pan, a socket wrench set, an oil filter wrench, new oil, a new oil filter, rags, and gloves.

    Step 2: Prepare Your Truck

    Park your truck on a level surface and engage the parking brake. If your truck has been running, allow the engine to cool for at least 30 minutes to avoid burns.

    Step 3: Locate the Oil Drain Plug

    Identify the oil drain plug under your truck. It is typically located on the oil pan at the bottom of the engine. Refer to the owner’s manual if you’re uncertain.

    Step 4: Drain the Old Oil

    Position the oil catch pan beneath the drain plug. Use the socket wrench to carefully remove the plug, allowing the old oil to flow into the pan. Be cautious as the oil may still be warm.

    Step 5: Remove the Oil Filter

    Using the oil filter wrench, turn the old oil filter counterclockwise to remove it. Note that some oil may spill out during this process, so ensure the catch pan is in place. After removing, check for any old filter gasket stuck to the engine.

    Step 6: Prepare the New Oil Filter

    Before installing the new oil filter, apply a small amount of new oil to the rubber gasket on the top of the filter. This helps ensure a good seal and makes removal easier for future changes.

    Step 7: Install the New Oil Filter

    Screw the new oil filter onto the engine by hand. Tighten it gently until secure, but avoid over-tightening which can cause damage.

    Step 8: Reinstall the Drain Plug

    Once the oil has fully drained, replace the drain plug and tighten it securely with the socket wrench. Ensure there are no leaks before proceeding.

    Step 9: Add New Oil

    Open the hood and find the oil filler cap, usually located on the top of the engine. Remove the cap and use a funnel to pour in the new oil, following the specifications in your owner’s manual for the correct type and amount.

    Step 10: Check Oil Level

    After adding oil, allow a few minutes for it to settle. Use the dipstick to check the oil level, adding more oil if necessary until it reaches the recommended mark.

    Step 11: Run the Engine

    Start the truck and let it idle for a few minutes. This allows the new oil to circulate. Check for leaks around the oil filter and drain plug.

    Step 12: Dispose of Old Oil and Filter

    Properly dispose of the old oil and filter at a recycling center or an auto parts store that offers disposal services. Never pour oil down the drain or onto the ground.

    Following these steps will help you drain your old oil and replace the oil filter correctly, ensuring your truck operates smoothly and efficiently.

    How to Properly Fill New Oil and Check for Leaks

    How to Properly Fill New Oil and Check for Leaks

    After draining the old oil and replacing the oil filter, you are ready to fill your truck with new oil. Start by selecting the correct type and viscosity of oil according to your vehicle’s specifications found in the owner’s manual.

    Begin by placing a funnel in the oil fill opening, which is usually located on the top of the engine. This will help prevent spills and make the pouring process smoother. Carefully pour the new oil into the funnel, monitoring the amount to avoid overfilling. Most trucks require between 4 to 8 quarts, so consult your manual for the exact volume needed.

    Periodically check the oil level using the dipstick. Remove the dipstick, wipe it clean, reinsert it fully, and then pull it out again to check the level. The oil should be within the designated range marked on the dipstick. Add oil in increments if necessary, ensuring you do not exceed the recommended level.

    Once the oil is added, start the engine and let it run for a few minutes. This allows the new oil to circulate throughout the engine and the oil filter. After shutting off the engine, wait a couple of minutes, then check the oil level again using the dipstick to ensure it is still within the appropriate range.

    Next, it is crucial to check for potential leaks. Inspect the oil filter and the oil drain plug for any signs of leaking oil. Look under the truck for any puddles or drips. If you notice any leaks, turn off the engine and tighten the oil filter and drain plug as necessary. If leaks persist, consider consulting a professional.

    Finally, dispose of the old oil and oil filter properly at a recycling center or an auto parts store that accepts used oil. Keeping your oil change area clean and free of debris will help maintain a safe and efficient working environment.

  • How to Maintain Your Truck’s Suspension System

    How to Maintain Your Truck’s Suspension System

    How to Maintain Your Truck’s Suspension System

    Maintaining your truck suspension is crucial for ensuring a smooth ride, enhancing vehicle stability, and prolonging the lifespan of your truck. A well-functioning suspension system not only improves handling and comfort but also contributes to the overall safety of your vehicle. Whether you use your truck for work, leisure, or off-road adventures, keeping the suspension in optimal condition should be a priority.

    Regular inspections and maintenance can help identify potential issues before they develop into costly repairs. Over time, wear and tear on suspension components like shocks, struts, and bushings can lead to diminished performance. By being proactive, you can maintain the integrity of your suspension system and enjoy a better driving experience.

    This article will provide practical tips for truck owners to keep their suspension in top condition. From routine checks to recommendations for upgrades, these strategies will empower you to take charge of your vehicle’s performance and ensure a comfortable and safe ride, no matter where the road takes you.

    Regular Inspection of Suspension Components

    Regular Inspection of Suspension Components

    Regular inspection of your truck’s suspension components is crucial for maintaining optimal performance and safety. Begin by checking the shocks and struts for any signs of leakage or damage. Look for oil stains around these components, as they can indicate a failure that affects ride quality and handling.

    Next, assess the bushings, which are essential for dampening vibrations and allowing for smooth movement. Examine them for wear, cracks, or excessive play. Replace any worn bushings promptly to prevent further damage to the suspension system.

    Pay attention to control arms and ball joints, which are vital for maintaining alignment and stability. Inspect them for signs of rust or wear, and ensure that they are firmly attached. Any unusual noises during turns may signal that these components need attention.

    Don’t forget to check the sway bar links and other related components. A worn sway bar can lead to poor handling characteristics, especially during cornering. Inspect for any signs of corrosion or loose connections that could impair performance.

    Finally, ensure that the suspension is properly aligned. Misalignment can cause uneven tire wear and affect overall handling. It’s advisable to have the alignment checked periodically, particularly after hitting bumps or potholes.

    Incorporating regular inspections into your maintenance routine not only extends the life of your suspension system but also enhances the overall driving experience of your truck.

    Maintaining Proper Tire Pressure and Alignment

    Maintaining Proper Tire Pressure and Alignment

    Proper tire pressure is essential for the overall performance and safety of your truck. Under-inflated tires can lead to increased wear and tear, poor fuel efficiency, and compromised handling. Conversely, over-inflated tires can cause a harsh ride and reduced traction. To ensure optimal pressure, regularly check the tires using a reliable gauge, and maintain them according to the manufacturer’s specifications found in your owner’s manual or on the driver’s side door jamb.

    In addition to tire pressure, proper alignment is crucial for the suspension system’s longevity and vehicle stability. Misalignment can result in uneven tire wear, decreased fuel efficiency, and poor steering responsiveness. Regularly inspect wheel alignment, especially after hitting rough terrain or potholes. Most mechanics recommend alignment checks at least once a year, or whenever you replace your tires.

    A well-maintained suspension system relies on balanced tire pressure and correct alignment. Addressing these factors not only enhances performance but also prolongs the life of your tires and improves the overall safety of your truck on the road. Consider seeking professional help for alignment adjustments and ensure that your tire pressure is monitored before long trips or towing heavy loads.

    Choosing the Right Suspension Upgrades and Replacement Parts

    Selecting the correct suspension upgrades and replacement parts is vital for maintaining optimal performance and comfort in your truck. When making these choices, consider the following factors:

    1. Identify Your Needs: Determine the primary purpose of your truck. Will it be used for heavy hauling, off-roading, or daily commuting? Different applications require specific suspension configurations. For example, off-road enthusiasts may seek lifts and shocks designed for rugged terrain, while those who tow often may prioritize load-bearing capacity.

    2. Understand Suspension Types: Familiarize yourself with various suspension systems. Common options include leaf springs, coil springs, and air suspension. Each type has its benefits and drawbacks. Leaf springs are robust and excellent for hauling, while air suspensions offer adjustable ride heights for versatility.

    3. Compatibility: Ensure that any upgrades or replacement parts are compatible with your truck’s make and model. Manufacturers often provide lists of suitable components. Mismatched parts can lead to performance issues and safety concerns.

    4. Quality Over Price: Invest in high-quality components from reputable brands. Cheaper parts may save money upfront but often lead to premature wear and frequent replacements. Look for components with warranties, indicating manufacturer confidence in their durability.

    5. Consult Experts: If unsure about what to choose, consult with suspension specialists or trusted mechanics. Their expertise can guide you toward the best options tailored to your truck’s requirements.

    6. Installation Considerations: Evaluate whether you will perform the installation yourself or hire a professional. Some upgrades may require specialized tools or expertise, so consider your skill level before proceeding.

    7. Suspension Geometry: When upgrading, pay attention to suspension geometry. Alterations can affect ride quality, handling, and tire wear. Upgrades should maintain the intended geometry to ensure stability and safety.

    By carefully considering these factors, you can make informed decisions about suspension upgrades and replacements, resulting in improved performance, safety, and longevity for your truck.