

Rust damage can significantly affect the appearance and longevity of your truck. Over time, exposure to moisture and road elements can lead to the deterioration of metal surfaces, making it essential for truck owners to address these issues promptly. In this guide, we will walk you through the necessary steps to effectively repair rust damage on your truck body, ensuring that your vehicle remains in top condition and retains its value.
Understanding the extent of rust damage is crucial before starting any repair work. Surface rust, which appears as small spots or patches, is often easier to treat compared to scale rust, which can penetrate deeper into the metal. In this article, we will discuss how to identify the different stages of rust, as well as the tools and materials needed to tackle these problems effectively.
Additionally, the repair process involves several key steps, including cleaning the affected area, removing rust, applying primer, and painting to restore your truck’s appearance. By following this comprehensive guide, you will not only enhance your truck’s aesthetics but also protect it from further corrosion. With dedication and the right techniques, you can achieve professional-level repairs right in your own garage.
Identifying the Extent of Rust Damage
Understanding the level of rust damage on your truck’s body is crucial for effective repair. Start by examining the affected areas visually. Look for discoloration, which often indicates the presence of rust beneath the surface. Check for any bubbles or blisters in the paint; this can signify that rust is forming underneath, separating the paint from the metal.
Focus on common rust-prone locations, such as the wheel wells, undercarriage, and around the doors. These spots are frequently exposed to moisture and debris, leading to accelerated rusting. Use a magnet to assess the integrity of the metal; if the magnet does not stick to a section of the body, it may suggest that rust has created a significant hole or weakened the metal.
Next, perform a sound test. Gently tap on the rusty areas using a hammer or a similar tool. A hollow sound indicates potential decay beneath the surface, while a solid sound suggests the metal is still intact.
Additionally, it is important to look for signs of penetration by probing the rusted spots with a screwdriver or a similar tool. If the tool goes through the rusted area easily, this indicates serious damage that may require extensive repair or replacement.
Document your findings in detail, noting the size and location of each rust spot. Keep track of how deep the rust appears to be, as shallow surface rust is often easier to repair than deep corrosion. Assess whether the damage is localized to one area or if it has spread, as this will influence the approach you take during repairs.
By meticulously evaluating these factors, you will gain a clearer understanding of the extent of rust damage on your truck. This assessment is essential for planning an effective repair strategy.
Step-by-Step Process for Rust Removal and Repair
Begin by assessing the extent of the rust damage on your truck body. Determine whether the rust is superficial or has penetrated deeper layers of metal, which may require more extensive repair.
Gather necessary tools and materials, including sandpaper of varying grits, a wire brush, rust remover solution, an angle grinder, a clean rag, body filler, primer, and paint. Ensure you also have personal protective equipment, such as gloves and a mask.
Next, clean the affected area thoroughly to remove dirt, grease, and debris. Use soap and water, followed by a clean rag to dry the surface. This step ensures you can accurately assess the rust damage beneath the surface layer.
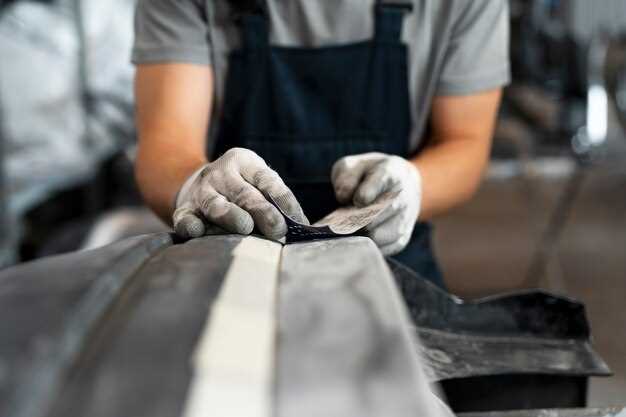
Once the area is clean, use a wire brush or angle grinder to remove loose rust and paint. Start with a coarse grit sandpaper to chip away at the rusted areas, then progress to finer grits for a smoother finish. Be careful to avoid damaging surrounding healthy metal.
After rust removal, apply a rust converter solution to any remaining rust spots. This chemical transforms rust into a stable compound and prevents further corrosion. Follow the manufacturer’s instructions for the best results.
Once the rust converter has dried, apply body filler if there are any deep pits or holes. Press the filler into the damaged areas and shape it to match the surrounding surface. Allow the filler to cure according to package instructions and sand it down for a seamless finish.
Following the body filler application, clean the area again and apply a primer designed for metal surfaces. This step aids in adhering the final paint and provides an additional layer of protection against moisture.
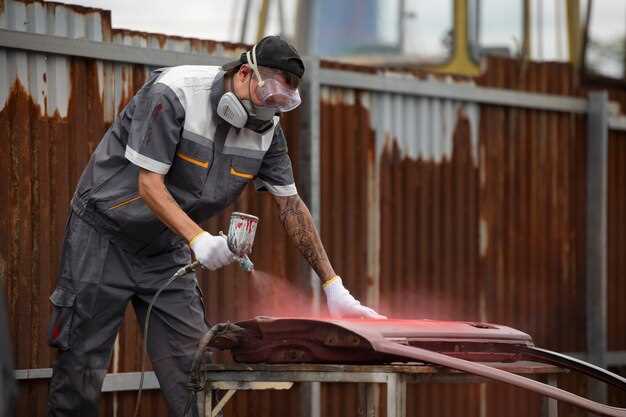
Once the primer has dried, it’s time to paint the repaired area. Choose a paint that matches your truck’s color. Apply multiple thin coats, allowing each coat to dry completely before applying the next. This technique ensures an even and professional-looking finish.
Finally, after the final coat of paint has dried, clear the area of any tools and debris. Inspect your work, and if satisfied with the outcome, you may apply a clear coat for extra protection against wear and environmental factors.
Regular maintenance inspections are recommended to catch any signs of rust early, ensuring the longevity of your truck body repair.
Choosing the Right Paint and Finishing Techniques for Longevity
When it comes to repairing rust damage on your truck body, selecting the appropriate paint and finishing techniques is crucial for ensuring durability and protection against future rust. The first step is to choose a high-quality automotive paint that is specifically designed for metal surfaces. Look for paints that contain rust-inhibiting properties and are resistant to chipping and fading.
Consider using epoxy primers as a base coat. These primers provide excellent adhesion and corrosion resistance, creating a solid foundation for the paint. Applying a primer not only enhances the bond between the substrate and the paint but also helps prevent moisture from penetrating the metal surface.
Next, the choice of paint finish is significant. A urethane enamel offers excellent durability and finishes with a glossy appearance, making it a popular choice for truck bodies. This type of paint withstands harsh weather conditions and provides a robust protective layer against scratches and UV rays. Always opt for paints with a hardener for added strength and longevity.
Application techniques also play an essential role in the outcome. Achieving a smooth, even finish requires proper techniques such as spray painting or using a paint applicator. Ensure to apply multiple thin coats rather than a single thick coat to prevent runs and drips. Allow adequate drying time between coats to ensure each layer adheres properly and cures completely.
Lastly, consider finishing your painted surface with a clear coat. This additional layer provides an extra level of protection, enhances shine, and aids in resisting chemicals and environmental damage. Ensure that the clear coat is compatible with your chosen paint for optimum results. By carefully choosing the right paint and employing effective finishing techniques, you can significantly prolong the life of your truck’s exterior while maintaining its aesthetic appeal.